> For the complete documentation index, see [llms.txt](https://docs.escapedirector.com/llms.txt). Markdown versions of documentation pages are available by appending `.md` to page URLs; this page is available as [Markdown](https://docs.escapedirector.com/build-your-rooms/connect-room-devices.md).

# Connect Room Devices

Connect a controller, configure its props, and test them with your Room.

Use **Escape Director firmware** to set up supported puzzle behavior in the app. You do not need Arduino IDE or the SDK for this path. Choose **Your own firmware (SDK)** only when you or your developer will write the controller's program.

## Before you start

Use Chrome on the computer that will operate the Room. Have your controller, a USB data cable and Wi-Fi password ready. For a GIGA R1 WiFi, attach its external antenna. Start on the same non-guest network as the Room Station; the devices must be allowed to communicate with one another.

The current managed setup supports Arduino GIGA R1 WiFi and UNO R4 WiFi. Custom SDK setup supports both boards. Keep the controller's prop outputs disconnected while installing firmware and setting up wiring.

## 1. Connect Room Connector

1. Open your Room, choose **Edit**, then **Devices**.
2. Connect **Room Connector**. On a Mac, download it when prompted, move the app to **Applications**, and open it. Use the download for your Mac’s processor. The first time you open it, macOS may say it can’t verify Room Connector. Choose **Done**, open **System Settings → Privacy & Security**, and choose **Open Anyway**. You only need to do this once for each version.
3. When Chrome asks to open Room Connector, allow it. Choose **Connect** in Room Connector's window.
4. If Chrome asks to access devices on your local network, allow access for Escape Director. This lets the page reach Room Connector on this computer.
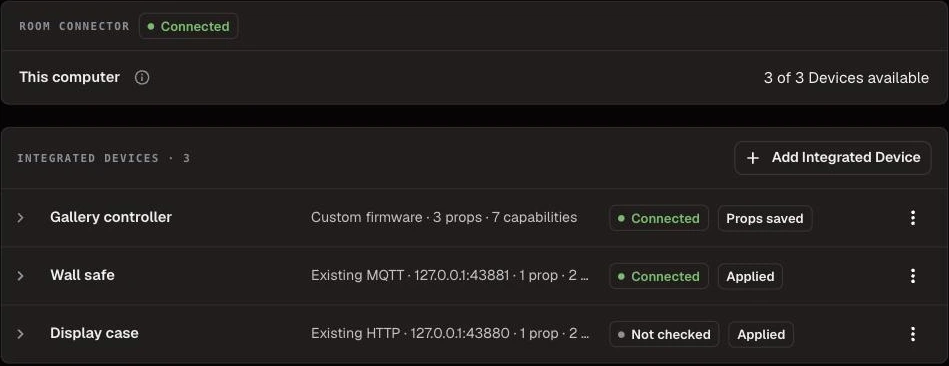
5. Return to the Devices tab and confirm Room Connector says **Connected**.

<figure><img src="https://4201072019-files.gitbook.io/~/files/v0/b/gitbook-x-prod.appspot.com/o/spaces%2FC32oMJLkI8XnHB2QVSVO%2Fuploads%2Fgit-blob-26957ba795e5b76485fc0d7c7eb5381e9f2e57f7%2Fdevices-overview.webp?alt=media" alt="Devices tab for The Curator&#x27;s Vault: Room Connector connected and three Devices available"><figcaption><p>Room Connector is connected and every Device in the Room shows its status.</p></figcaption></figure>

Keep Room Connector running on this computer while operating the Room. You do not need to reinstall it when you refresh the page.

## 2. Add and pair your controller

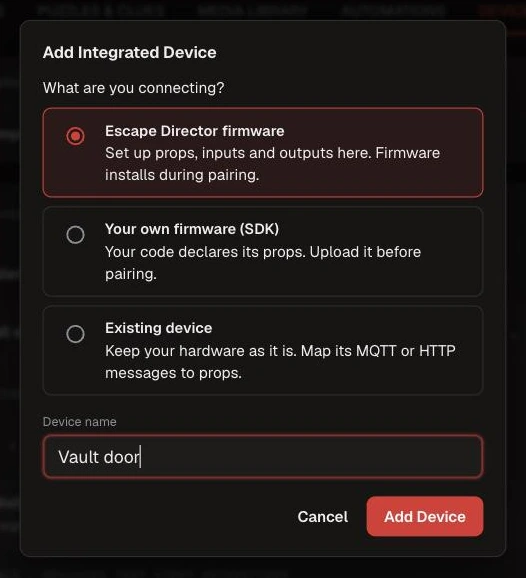
1. Choose **Add Integrated Device**, then **Escape Director firmware**.
2. Give the Device a recognizable name and choose **Add Device**.
3. Close Arduino IDE's Serial Monitor and any other program using the controller. Connect it by USB, choose **Pair controller**, and select the controller in the setup dialog when prompted. Room Connector handles the USB connection.
4. If the board needs firmware, choose **Install firmware** and select your board. Installation replaces its current program. Leave the cable connected while the controller restarts; setup continues to Wi-Fi by itself.
5. Follow the setup steps to choose a Wi-Fi network and enter its password. Use **Scan again** if needed, or **Enter name manually** for a hidden network.
6. Wait for setup to confirm that the controller reached the Room Station.

<figure><img src="https://4201072019-files.gitbook.io/~/files/v0/b/gitbook-x-prod.appspot.com/o/spaces%2FC32oMJLkI8XnHB2QVSVO%2Fuploads%2Fgit-blob-631d01e7139eda63c30d7a91dba3c42ee3b2dfcf%2Fadd-device-choices.webp?alt=media" alt="Add Integrated Device dialog with Escape Director firmware selected, Your own firmware (SDK), Existing device, and a Device name field"><figcaption><p>Choose what runs on the controller, then name the Device.</p></figcaption></figure>

USB is needed for initial setup and firmware installation. After successful setup, normal communication uses Wi-Fi. The controller still needs a suitable power source.

## 3. Configure the props

1. Add the props this controller will operate.
2. Choose each prop's behavior and assign the input and output channels to match the wiring. Several props can share one board using different channels.
3. For an ordered sequence, arrange the input rows in the order players must activate them.
4. Choose **Save and apply**, confirm, and wait for the controller to confirm the change. If the changes are already saved, the button says **Apply**.

If the app reports a problem, correct it before testing. Saving a configuration in the app and applying it to the physical controller are separate steps.

## 4. Test before running a game

1. Turn on **Test mode**.
2. Operate each physical input and check the reported progress and actual output.
3. Reset the prop and try the inputs in a different order. Confirm each prop controls only its intended output.
4. Leave the inputs in their starting positions, reset the props, and turn off Test mode before changing configuration or starting a game.

Test mode does not run Automations or change Room Puzzle completion. Device activity and diagnostics are separate from the Session Log. Use the board's wiring instructions to connect and verify the intended loads before admitting guests.

## 5. Link props to Room Puzzles

1. In a prop's **Completes Puzzle** selector, choose the Puzzle it represents. Different props can link to different Puzzles.
2. Start a practice game from the Room Dashboard. Complete the Puzzle from the Dashboard and check that the linked prop completes.
3. Finish the game, then choose **Reset Room**. Start another practice game and solve the physical prop. Check that its Puzzle completes once.
4. Finish and reset again. Check controller power-cycle recovery before using the Room with guests.

A linked Puzzle handles both directions without reciprocal Automations. Use Automations when completion should also trigger other actions, such as audio.

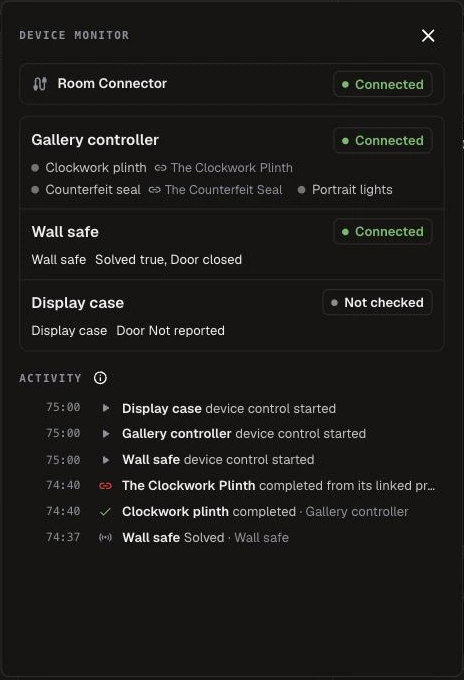
During a running game, the same controller can show **Reconnecting…** while recovering, then resume control automatically. Commands missed during the gap are not repeated. If **Device control paused** remains, check the controller and any reported problem before choosing **Resume device control**.

<figure><img src="https://4201072019-files.gitbook.io/~/files/v0/b/gitbook-x-prod.appspot.com/o/spaces%2FC32oMJLkI8XnHB2QVSVO%2Fuploads%2Fgit-blob-7888b05380a42513fdd51fbf027bc4932bc7fab3%2Fdevice-monitor.webp?alt=media" alt="Device Monitor during a game: Room Connector connected, three Devices with their props, and Activity showing The Clockwork Plinth completed from its linked prop"><figcaption><p>During a game, open Devices on the Room Dashboard to see each prop and recent activity.</p></figcaption></figure>

## Updating Room Connector

**Update required** means a feature needs a newer Connector. **Update available** means a newer version is ready to download, but your current Connector can still operate the Room. Finish any running game before updating.

On a Mac, quit Room Connector, replace the existing app in Applications with the new download, then open it again. Restarting the old app does not update it. Keep your existing setup; you should not need to pair again.

## If setup is interrupted

Keep the same Device and reopen its **Controller setup**. Confirm Room Connector is running on this computer, then reconnect the USB controller if requested. Close other programs using the USB connection before retrying. Do not add a second Device or reinstall firmware merely because a connection attempt failed.

Joining Wi-Fi and reaching the Room Station are separate steps. If Wi-Fi connects but setup cannot reach the station, confirm both use the same network and that it allows devices to communicate. Moving a controller from another computer also requires updating its Room Station connection. Use **Reconnect to Room Station** if setup offers it, and wait for confirmation before testing the prop again.

If you denied Chrome's local-network permission, open the site's permissions, allow local-network access for Escape Director, then reload and reconnect Room Connector. If your organization manages that setting, ask its administrator for access. Keep the browser and firewall protections enabled.

## Existing HTTP and MQTT devices

Choose **Existing device** to keep a device’s current firmware and map its messages to Escape Director. Follow [Connect Existing Devices](/build-your-rooms/connect-existing-devices.md).

## Using your own firmware

Choose **Your own firmware (SDK)** when you or your developer write the controller's program. Its props and wiring are defined in the firmware, not in the app. Follow [Build Your Own Controller](/build-your-rooms/build-your-own-controller.md) to pair it, save its props and update it later.

## Next

[Configure Room Automations](/build-your-rooms/configure-room-automations.md) to use your props' signals and commands alongside the Room's other actions.